
OpenVPN server setup on AWS – How to ?
In this tutorial, we will learn “OpenVPN server setup on AWS”
OpenVPN
OpenVPN is an opensource commercial software that is used to create Remote VPN as well as Site-to-Site VPN Tunnel.
Remote VPN enables an Individual User to connect private networks(e.g- Office Network) from remote locations. Using a Site-to-Site VPN, users from two different private networks ( e.g – two branch offices) can connect to each other.
An unlicensed OpenVPN server will only ever allow 2 simultaneous connections. If you want more than two simultaneous connections, you need to purchase OpenVpn Licence for at least 10 devices of around 180 dollars.
In this tutorial, we will learn to Setup OpenVPN Server on AWS for Remote VPN connection to AWS Resources from end-users.
Read About: 21 Important AWS Services you must know
&& How to extend AWS EBS Volume with Zero downtime
OpenVPN server setup on AWS
Step 1 – Launch OpenVPN Instance from AWS Marketplace.
Login to your AWS account and navigate to Services—-> EC2 —-> INSTANCES —-> Instance and then click on Launch Instance
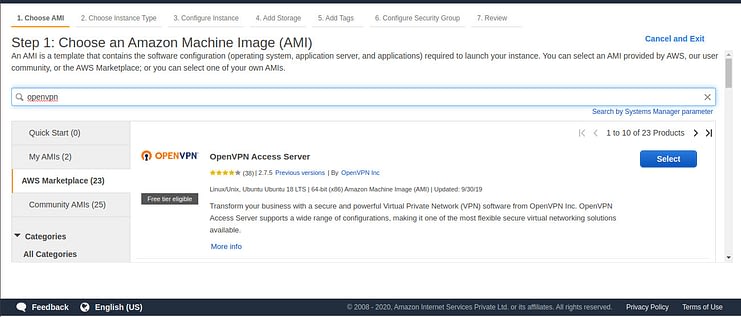
Select AWS Marketplace and search for Openvpn
Select OpenVPN Access Server
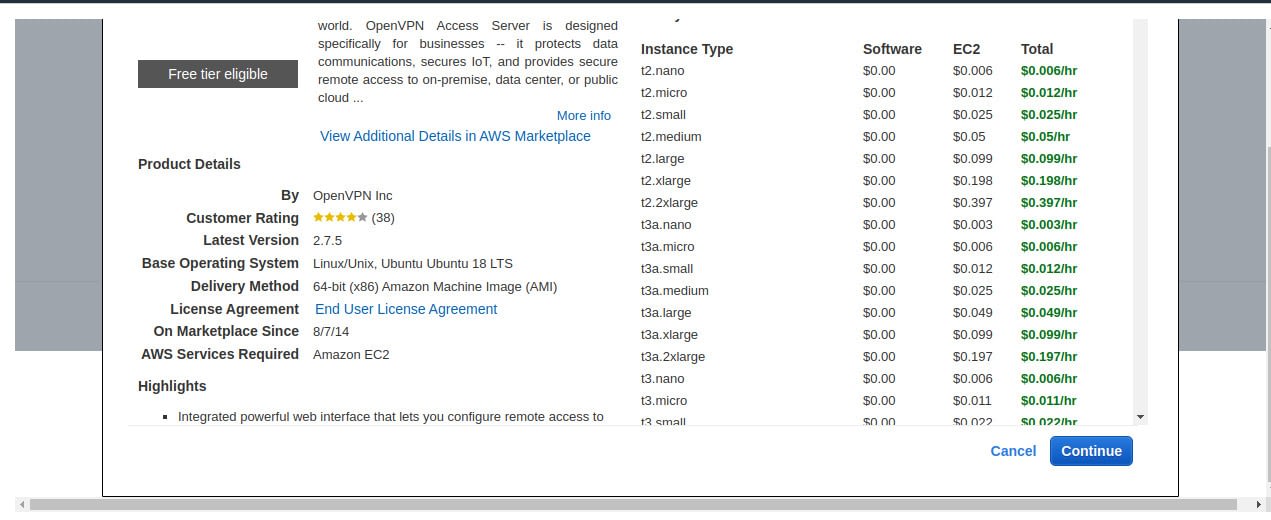
After Selecting, the following screen will appear that shows the OpenVPN access Server pricing details.
However, there is no Software price and very minimal instance pricing for T2/T3 instances.EC2 Instance charges for Micro instances are free for up to 750 hours a month if you qualify for the AWS Free Tier.
Click on Continue
Choose your Instance Type and Next: configure Instance Details. I am using T2 Micro Instance(Free Tier) for this Setup.
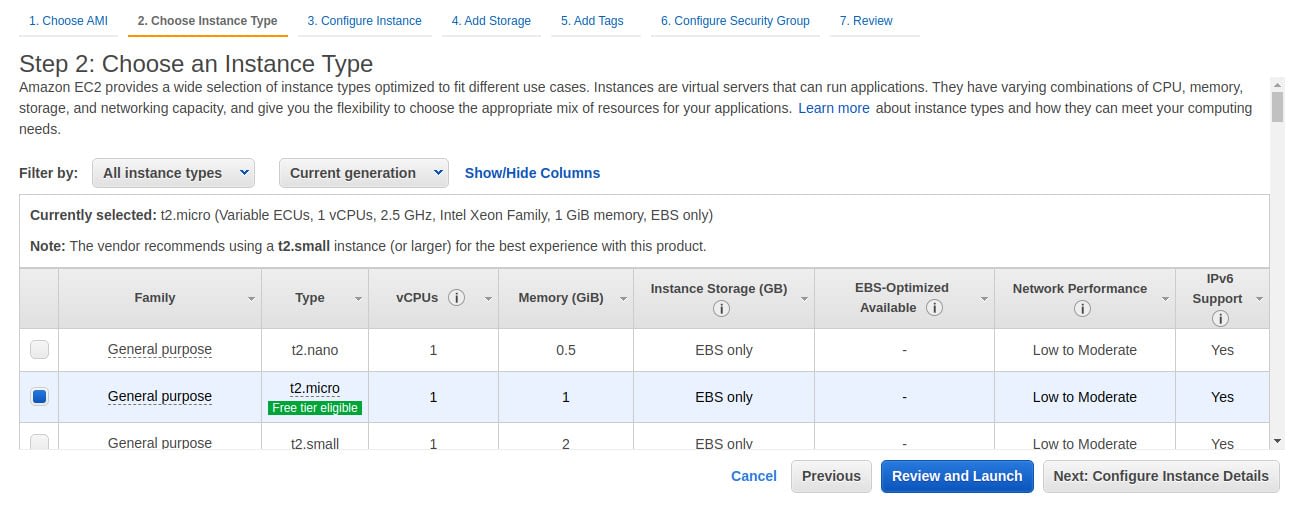
To Configure and Launch your OpenVPN Server Instance please follow How to Launch Linux Virtual Machine on AWS(Note: Follow the Step after Step 2: Choose an Instance Type in this tutorial).
Use the following Customization when you Launch the OpenVPN Server.
i) OpenVPN server VPC must be the same as the VPC whose resources you want to access using VPN.
ii) Enable Auto Assign Public IP for OpenVPN Server.
Note: You can also attach Elastic IP later if you do not Enable public IP at the time of the OpenVPN Server launch. Elastic IPs are also used if you do not want to change the Public IP of your server every time the server reboot.
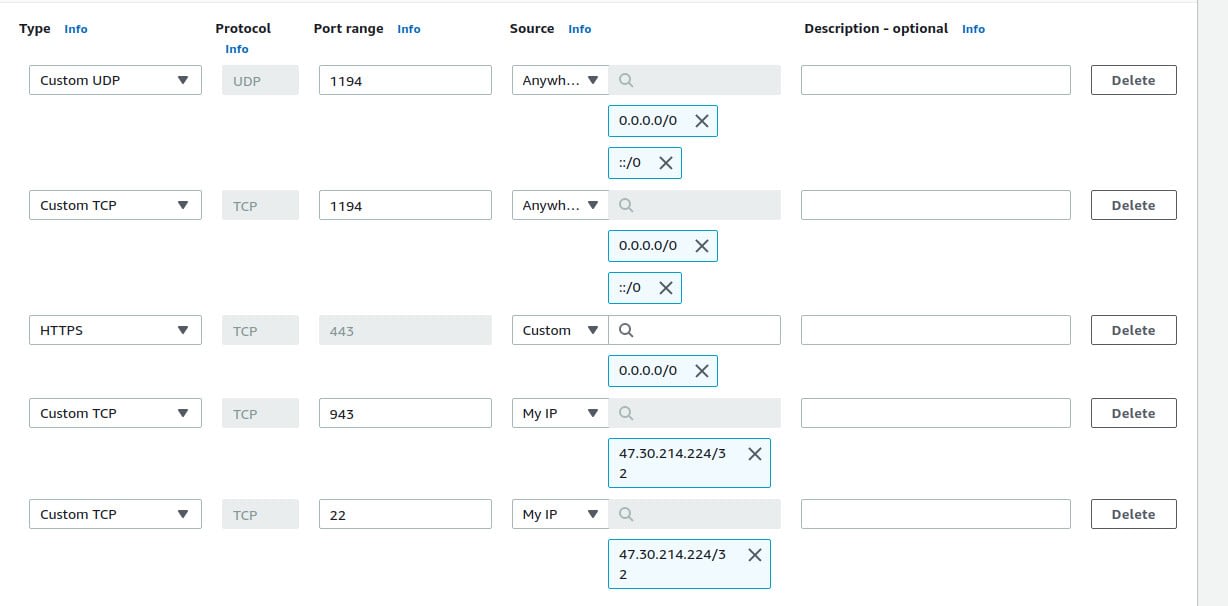
iii) Create a security group with the following :
Allow TCP/UDP port 1194, HTTPS Port 443 for anywhere. Also, allow TCP port 943 and 22 for your home or Office Network to access the OpenVPN Server from Web Browser and SSH respectively
Step 2 – Configure OpenVPN Access Server
After launching the OpenVPN Server, use the following command to SSH it from your Local Machine ( Use Terminal in Linux /MAC OS and use Putty/GitBash from Windows OS to run below command)
$ sudo ssh -i your-private-key [email protected]
The following prompt will appear. Enter the required details as follows :
Welcome to OpenVPN Access Server Appliance 2.7.5
System information as of Sat May 23 08:50:39 UTC 2020
System load: 0.01 Processes: 90
Usage of /: 30.5% of 7.69GB Users logged in: 0
Memory usage: 17% IP address for eth0: 10.100.10.10
Swap usage: 0%
OpenVPN Access Server
Initial Configuration Tool
OpenVPN Access Server End User License Agreement (OpenVPN-AS EULA)
Please enter ‘yes’ to indicate your agreement [no]: yes
Once you provide a few initial configuration settings,
OpenVPN Access Server can be configured by accessing
its Admin Web UI using your Web browser.
Will this be the primary Access Server node?
(enter ‘no’ to configure as a backup or standby node)
> Press ENTER for default [yes]: yes
Please specify the network interface and IP address to be
used by the Admin Web UI:
(1) all interfaces: 0.0.0.0
(2) eth0: 10.200.22.231
Please enter the option number from the list above (1-2).
> Press Enter for default [1]: 1
Please specify the port number for the Admin Web UI.
> Press ENTER for default [943]: ———————-> Press Enter
Please specify the TCP port number for the OpenVPN Daemon
> Press ENTER for default [443]:———————> Press Enter
Should client traffic be routed by default through the VPN?
> Press ENTER for default [no]: ———————> Press Enter
Should client DNS traffic be routed by default through the VPN?
> Press ENTER for default [no]: ——————> Press Enter
Use local authentication via internal DB?
> Press ENTER for default [yes]: ——————-> Press Enter
Private subnets detected: [‘10.200.0.0/16’]
Should private subnets be accessible to clients by default?
> Press ENTER for EC2 default [yes]: ———————-> Press Enter
To initially login to the Admin Web UI, you must use a
username and password that successfully authenticates you
with the host UNIX system (you can later modify the settings
so that RADIUS or LDAP is used for authentication instead).
You can login to the Admin Web UI as “openvpn” or specify
a different user account to use for this purpose.
Do you wish to login to the Admin UI as “openvpn”?
> Press ENTER for default [yes]: ——————> Press Enter
> Please specify your OpenVPN-AS license key (or leave blank to specify later): ———————> Press Enter
Initializing OpenVPN…
…………………………………………………………
useradd -s /sbin/nologin “openvpn”
Writing as configuration file…
Getting hostname…
——————————————————————
Starting openvpnas…
NOTE: Your system clock must be correct for OpenVPN Access Server
to perform correctly. Please ensure that your time and date
are correct on this system.
Initial Configuration Complete!
You can now continue configuring OpenVPN Access Server by
directing your Web browser to this URL:
https://131.17.132.112:943/admin
Login as “openvpn” with the same password used to authenticate
to this UNIX host.
Step 3 – Reset the password of Openvpn user
Reset the password of openvpn user on OpenVPN Server to login and manage it from the Web browser.
$ sudo su
$passwd openvpn
Enter new UNIX password: ————->Enter New password
Retype new UNIX password: —————-> Confirm Password
passwd: password updated successfully
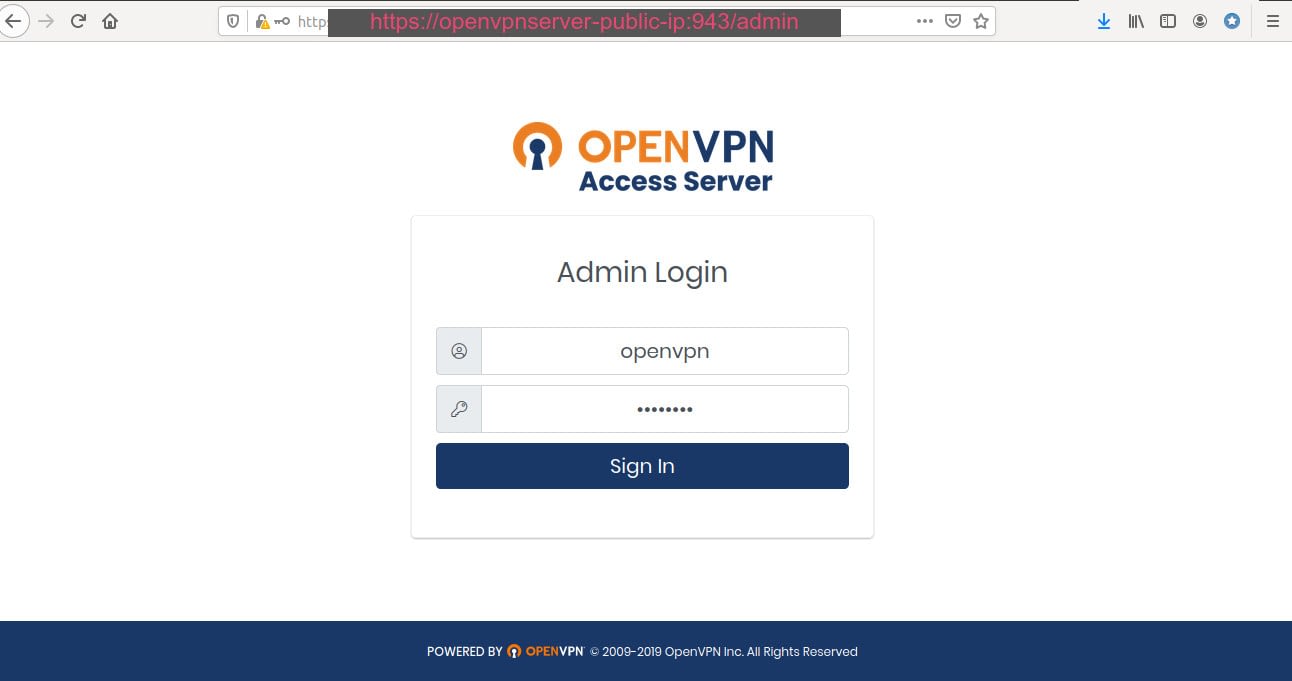
Step 4 – Login to OpenVPN Server admin console using Web Browser
Open the following link obtained in Step 2- Configure OpenVPN Access Server to login to the OpenVPN admin console to manage it.
https://Open-VPNServer-Public-IP:943/admin
e.g – https://131.17.132.112:943/admin
Username : openvpn
Password: ———-> Use Password that you reset in Step 3
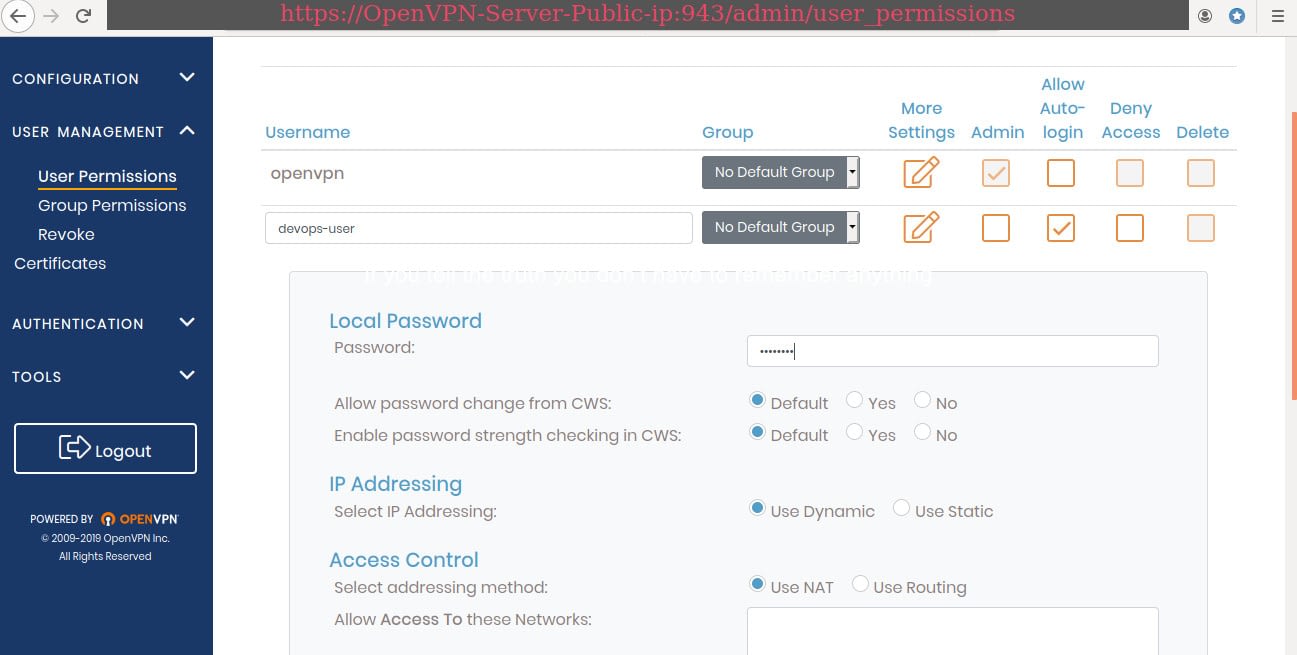
Step 5 – Create a VPN user to access AWS network resources.
Add a User say DevOps-user and save and then Update Running Server. Click on the checkbox for Auto Login profile for a User
Step 6 – OpenVPN client setup for the VPN connection to access AWS resources.
Ask the user to login to OpenVPN using the following URL to download the autologin profile for connecting VPN
https://Open-VPNServer-Public-IP:943/
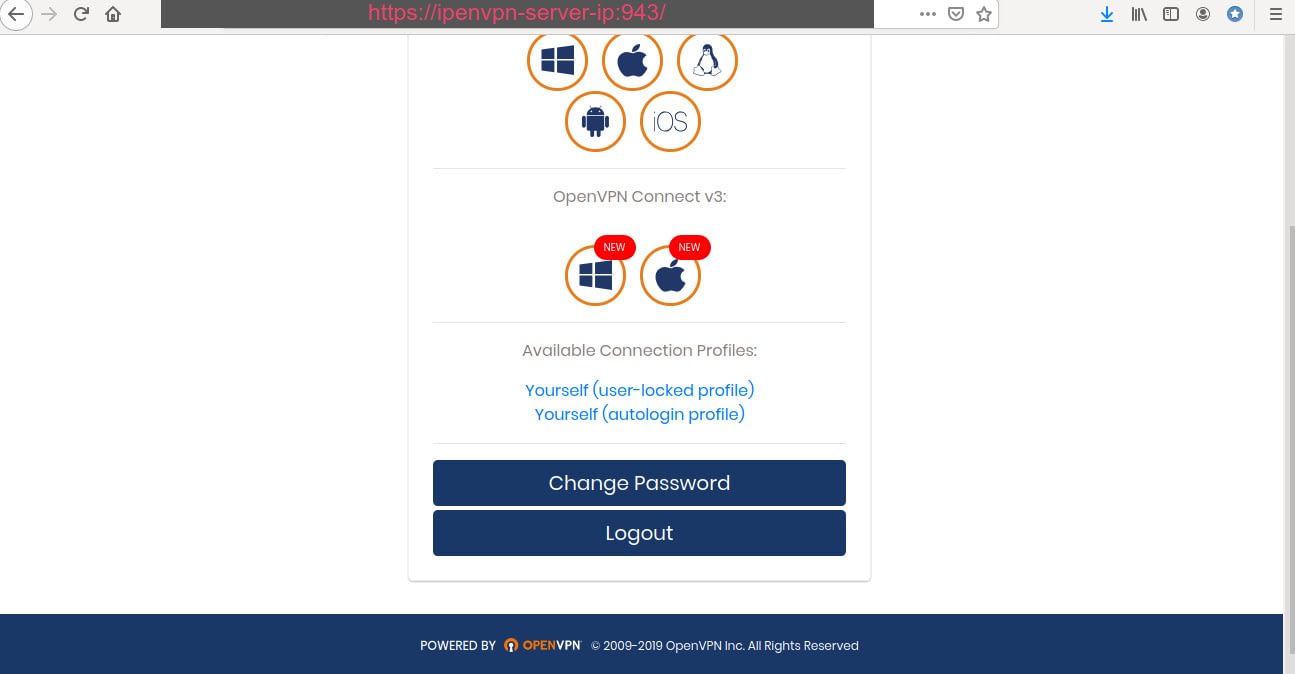
Note: Rename your downloaded autologin profile (e.g- Washington VPN, New York VPN, etc. ) accordingly so that you can recognize it.
i) For Linux Users
Use the following command to install and connect OpenVPN client
To Install OpenVPN Client
For Ubuntu/Debian
$ sudo apt-get install openvpn -y
For Centos/RHEL
$ sudo yum install openvpn -y
To Connect OpenVPN Client
$ sudo openvpn -config autologinprofile.ovpn
ii) For Windows/Mac Users
Users can download OpenVPN client software (By Clicking on the Windows icon / Apple icon on the top) after login into their profile (https://Open-VPNServer-Public-IP:943/) and install it on their Computer. After Installation, they also need to import their downloaded profile to the OpenVPN client.
Double click on your imported profile on OpenVPN client so as to connect your AWS resources.
Note: For MAC OS you can also use TunnelBlick(OpenSource) and for Windows, you can use Viscosity(Paid) as an alternative of OpenVPN Client software.
Step 7 – Allow OpenVPN server IP in AWS resources( eg.- Ec2 Instance), security group, to access particular service/port.
Suppose we have to provide access to a user to ssh an EC2 Instance in the private subnet using VPN. For this, we need to allow OpenVPN server IP Address for TCP Port 22 in the security group of the EC2 Instance.
Open the security Group of EC2 Instance or any Other resources (If you want to access that resource using VPN) and allow OpenVPN server IP for port 22(or any other port that you want to access) as follows:

Now you will able to SSH the EC2 Instance using its Private-IP directly after connecting VPN
Connect Open VPN and run the following command to SSH the EC2-Instance.
$ sudo ssh -i private-key-of-EC2-Instance [email protected]
——xx—————
Click to Tweet this tip!
I hope you enjoyed this tutorial and learned about the “OpenVPN server setup on AWS”. If you think this is really helpful, please do share this article with others as well. Please also share your valuable feedback, comment, or any query in the comment box. I will really happy to resolve your all queries any.
Thank You
If you think we have helped you or just want to support us, please consider these:-
Connect to us: Facebook | Twitter

Lenovo Tab M10 HD (2GB, 32GB, WiFi) Slate Black
 (116)
(116)