Clamav Antivirus-Install on Amazon Linux(EC2)
ClamAV is an Opensource Antivirus option for Linux/Unix O/S and protects your system against Trojans, malware and other security threats.
Linux is known for its security and believed as one of the most secure O/S. You might have heard people talking about how secure it is, and guaranteed for no Virus Attack on Linux Operating Systems. But in reality, Linux Operating Systems are also being infected by viruses.
If you want to protect your Linux O/S, Network or VPC and looking for an Open-Source Antivirus Software, you can go for ClamAV.
Also Read: Passwordless SSH login using public key and private key
&& 15 Important PostgreSql commands you must know
Install ClamAV Antivirus on Amazon Linux(EC2)
Here is the step by step guide to install ClamAV on AWS EC2(Amazon Linux).
Step 1- Add Epel repository to download ClamAV in your Amazon Linux.
$ sudo amazon-linux-extras install epel
Step 2- Install ClamAV and Clamd using YUM Command
$ sudo yum install clamav clamd -y
Step 3- Remove Example Strings from the Configuration file.
$ sudo sed -i -e “s/^Example/#Example/” /etc/clamd.d/scan.conf
$ sudo sed -i -e “s/^Example/#Example/” /etc/freshclam.conf
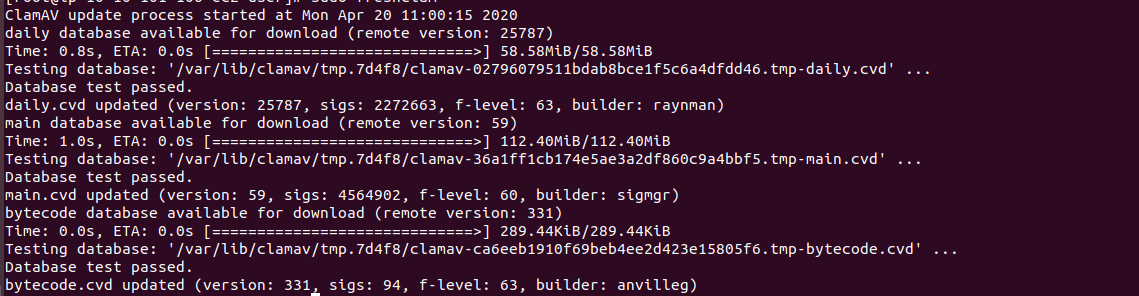
Step 4- Run Virus Defination Database update
$ sudo freshclam
Step 5- Uncomment the following line in scan.conf
Open the scan.conf file using nano command
$ nano /etc/clamd.d/scan.conf
Un-comment the following line by removing #
#LocalSocket /var/run/clamd.scan/clamd.sock
After removing # from the above line save and exists the file by pressing CTRL+O and CTRL+X
Step 6 – Start Clamd Service
$ sudo systemctl start [email protected]
Also, run the following command to run the service automatically if system reboots.
$ sudo systemctl enable [email protected]
Step 7- Disable or Modify SELINUX
To disable SELINUX run following command
$ setenforce 0
To modify SELINUX to Allow ClamAV run following command
$ sudo setsebool -P antivirus_can_scan_system 1
$ sudo setsebool -P clamd_use_jit 1
To Verify SELINUX run following Command
$ sudo getsebool -a | grep antivirus
It is OK if you get the below result.
antivirus_can_scan_system -> on
antivirus_use_jit -> off
Step 8- Setup a Cron job to schedule and update and scan.
Run the following command to setup a cron job, to learn more about cron job read my article Scheduling Cron job in Linux
$ crontab -e
Add the following line in the Cron.
20 02* * * /usr/bin/freshclam > /var/log/clamav/freshclam.log
30 02* * * /usr/bin/clamscan -ir / -l /var/log/clamav/clamd.log -copy=/usr/local/src/virusdetectiondirectory
Note: Create the directories /var/log/clamav/ and /usr/local/src/virusdetectiondirectory in your Linux Box.
The freshclam (Virus Definition database update) job is scheduled to run it everyday at 2:20 AM while Clamscan(Virus Scan) is scheduled to run 2:30 AM.
This Blog ends here.
I hope you enjoyed this tutorial and learned to Install Clamav Antivirus on Amazon Linux(EC2). If you think this article is helpful, please do share this post with others as well. Please also share your valuable feedback, comment or any query in the comment box. I will really happy to resolve your all queries.
Thank You
If you think we helped you or just want to support us, please consider these:-
Connect to us: Facebook | Twitter